
How to Create Custom Activities in UiPath
An “activity” in UiPath serves as the building blocks automations are structured on, which can now be fully customized in v2020.4. In this article, we’ll show you how to create custom activities in UiPath from start to finish.
What Are UiPath Custom Activities?
With the release of UiPath v2020.4, users want to learn how to create custom activities in UiPath, even if they have little to no experience with the existing Visual Studio tool. It’s within the Visual Studio that users follow a wizard-based tool to setup and create their custom activities to support their automations.
Activities include fields such as names, descriptions, properties, data types, and required fields. The combination of these items help create a custom activity, and generate all code related to the activity itself. Once created, the custom activities can then be published and ported over to UiPath Studio for download. We’ll detail the setup below, and walk through the necessary steps of creating these custom activities.
With every product comes some degree of limitations. Custom activities allow creators to bypass some, if not all, limitations that are code based. For example, I was tasked with subtracting dates and returning multiple values such as seconds, minutes, hours and days for each set of these dates. Imagine how time consuming this process would be to calculate this for hundreds of dates. To streamline this task, I decided to create a “custom date subtraction activity” to accomplish this feat.

How to Create Custom Activities in UiPath
For this setup example, we will be creating a custom activity to subtract dates and output the difference of days, hours, minutes and seconds. To walk through this example, you will need the following tools:
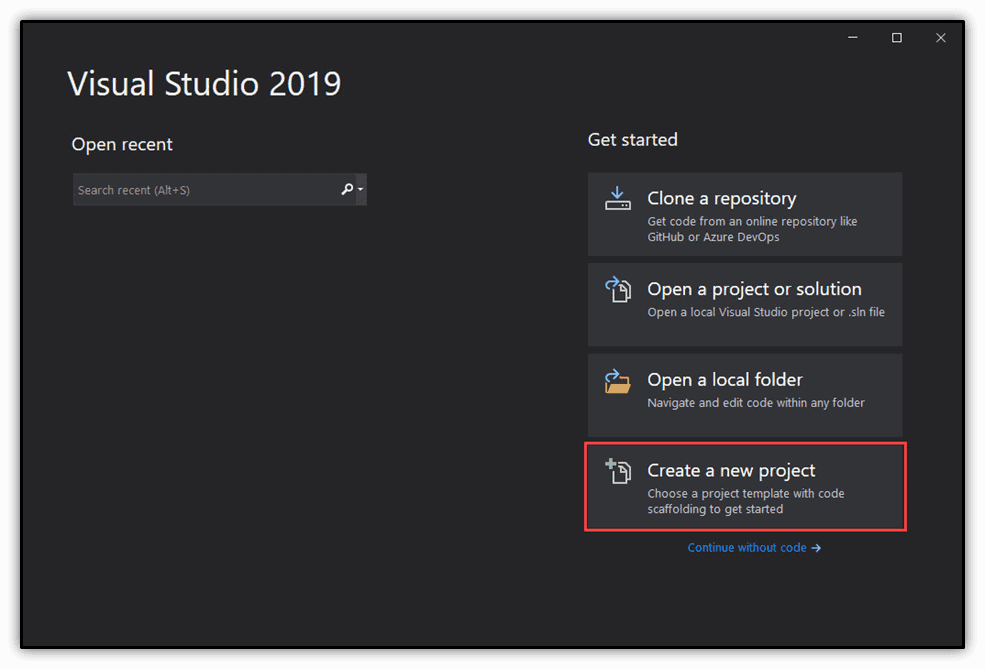
Step 1. Open Visual Studio and create a new project.
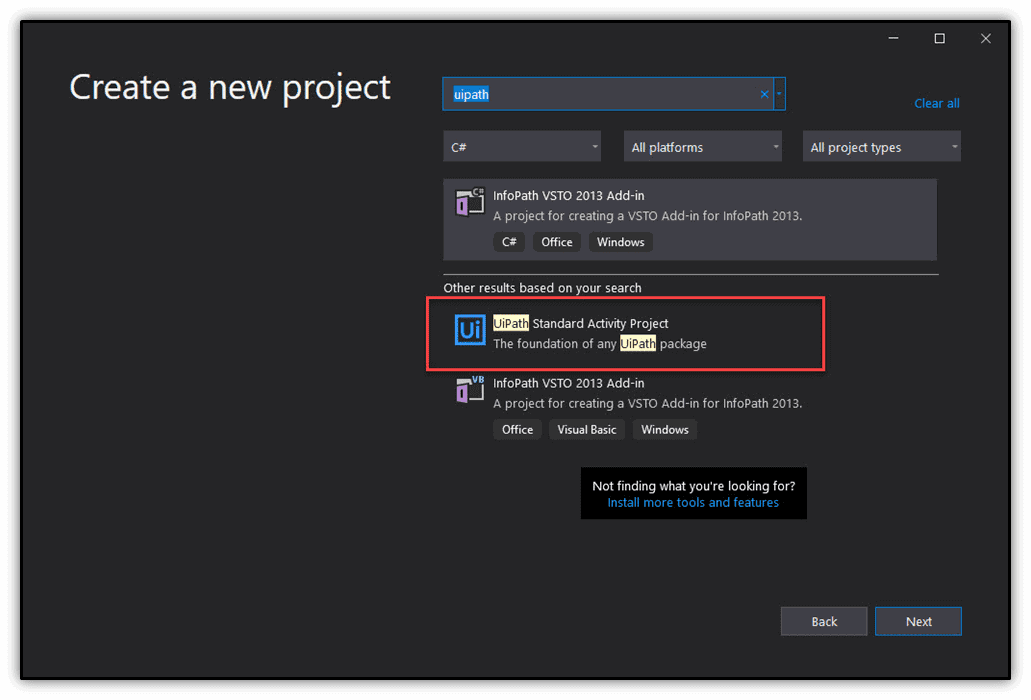
Step 2. Select “UiPath Standard Activity Project” as your starting template.
Step 3. Give your project a name and location. Afterwards, click your “project.activities” item within the solution explorer window – Click “extensions“, hover over UiPath, then click “add activities“.

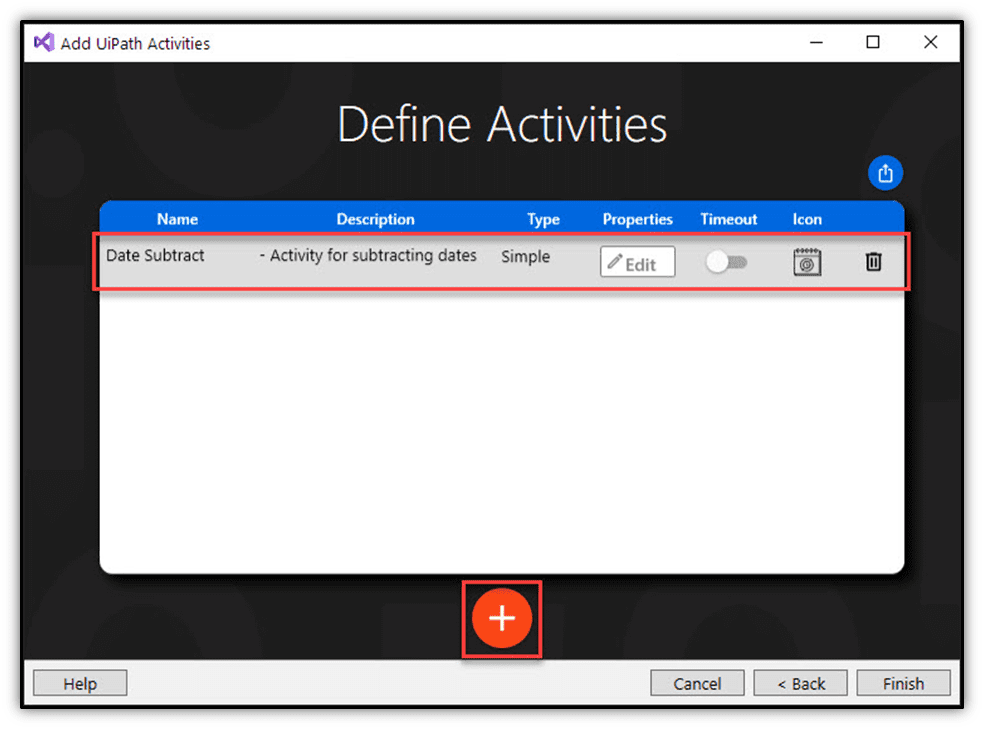
Step 4. Once the “add UiPath activities” window pops up, you are met with 2 options (Create or Import) – For this setup, let’s choose the “create” option. Afterwards, click the “add” button and fill in the available properties.
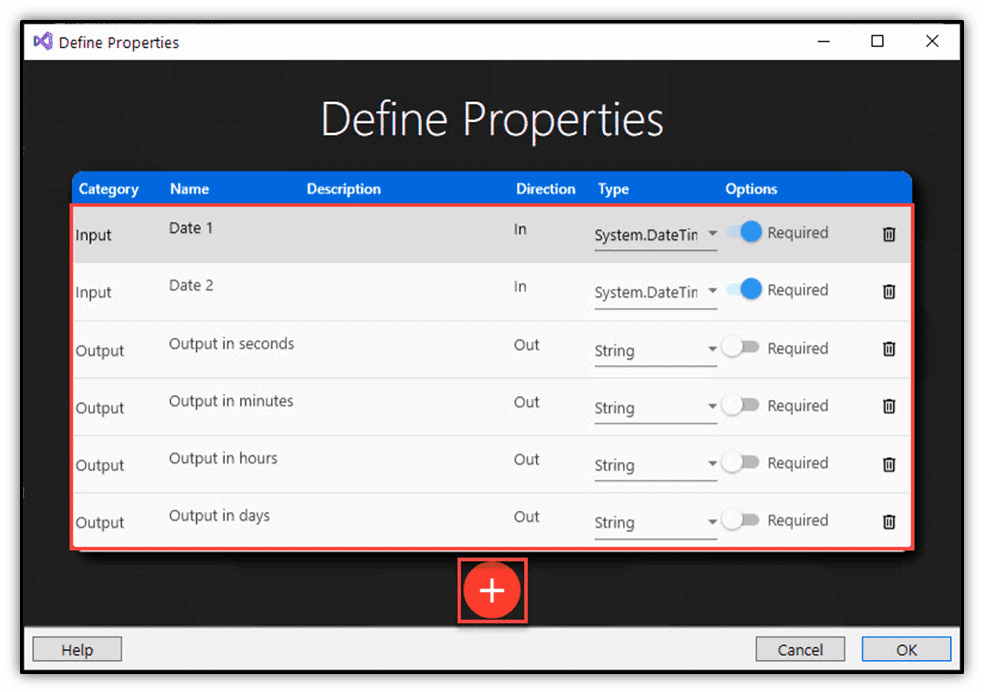
Step 5. Click the “edit” button to define the activity’s properties. Then click “add” and fill in the properties for the fields being added.
KEY NOTE: Our 2 date fields are our only inputs and required fields. The other fields are outputs and are not required to run the process.
Step 6. Click “Ok”, then “finish“. Your custom activity is now created! As shown below, the code for your newly created custom activity is pre-generated for you requiring minimal changes. For our code setup, we will be adding in some math equations and creating some strings to store our values within.

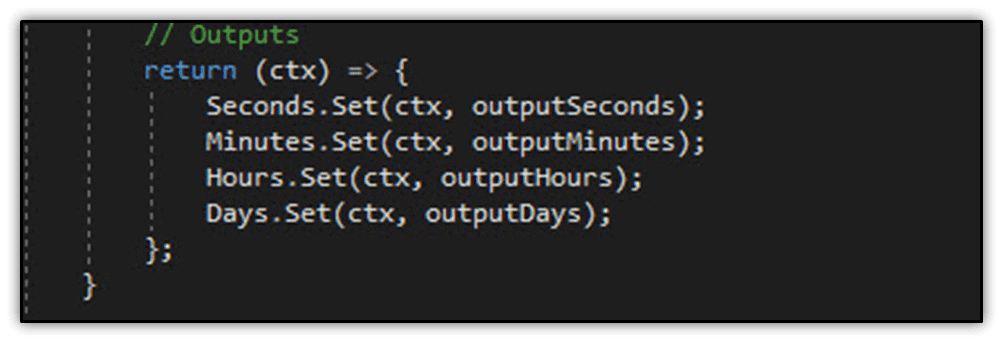
Step 7. Once our equations and variables are created, we map our output to be returned below:
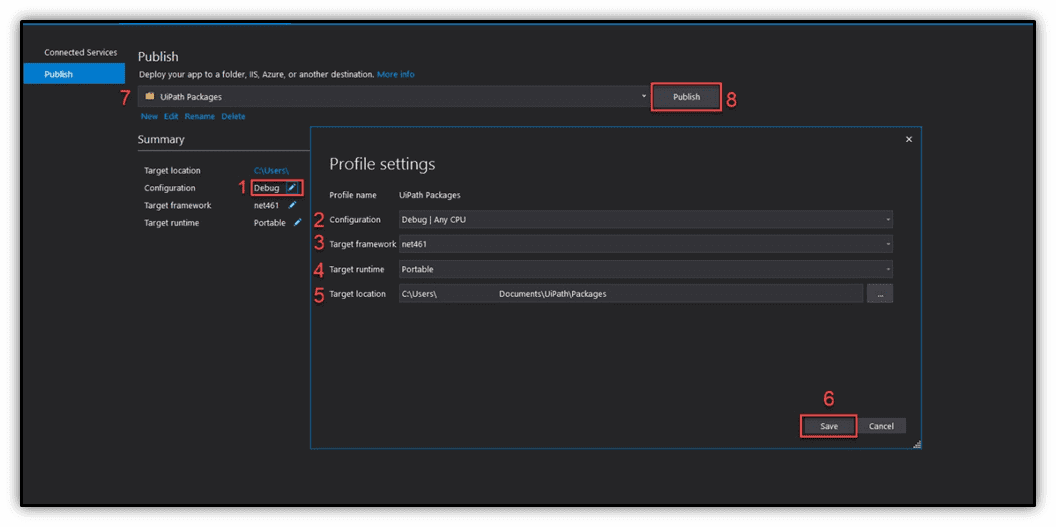
Step 8. Next, we right click the “project.activities.design” item and click “publish” from the menu. The window pictured below should pop up. Once it does, enter the required fields and hit “publish“.
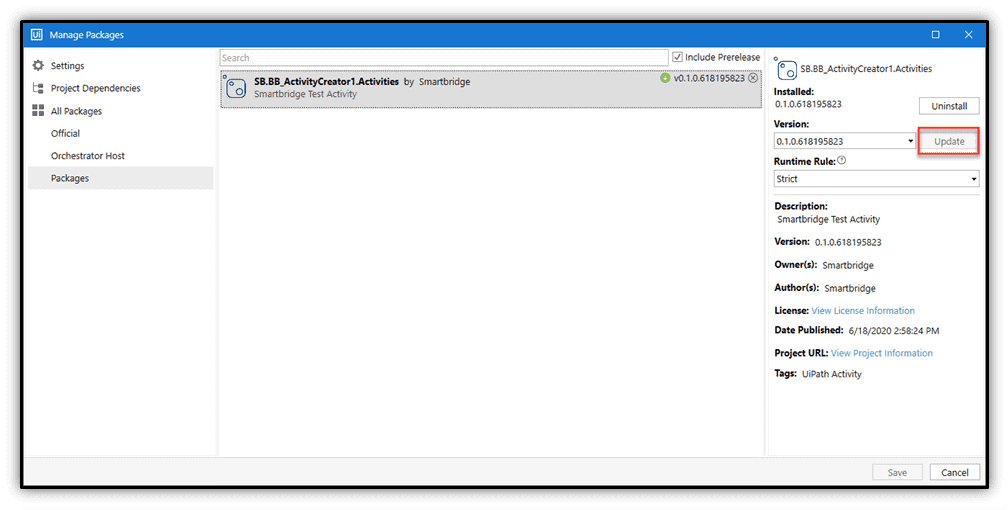
Step 9. Once the code is done being published, we can now open UiPath Studio. Within UiPath Studio, click the “manage packages” button. Then, navigate to the settings tab and select your package from the list of items.

Step 10. Once you select your package, make sure to install it. For subsequent uses you will be updating the package accordingly.
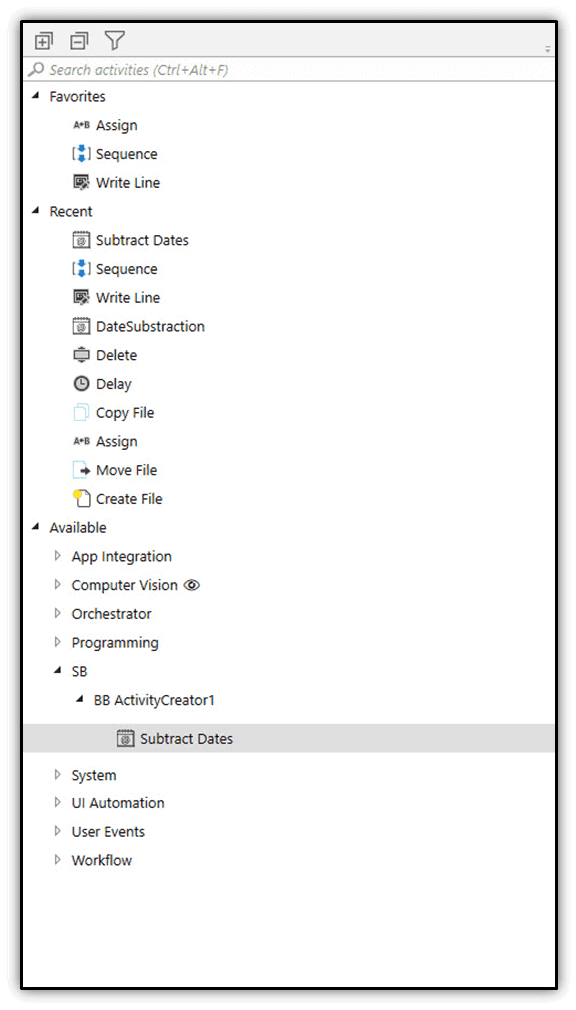
Step 11. Once installed, you will now see your custom activity located within your project activities panel. Drag and drop your activity to the designer panel to populate and test your activity.
Step 12. Below is an example of how I populated my custom activity, please feel free to update or change to your liking.
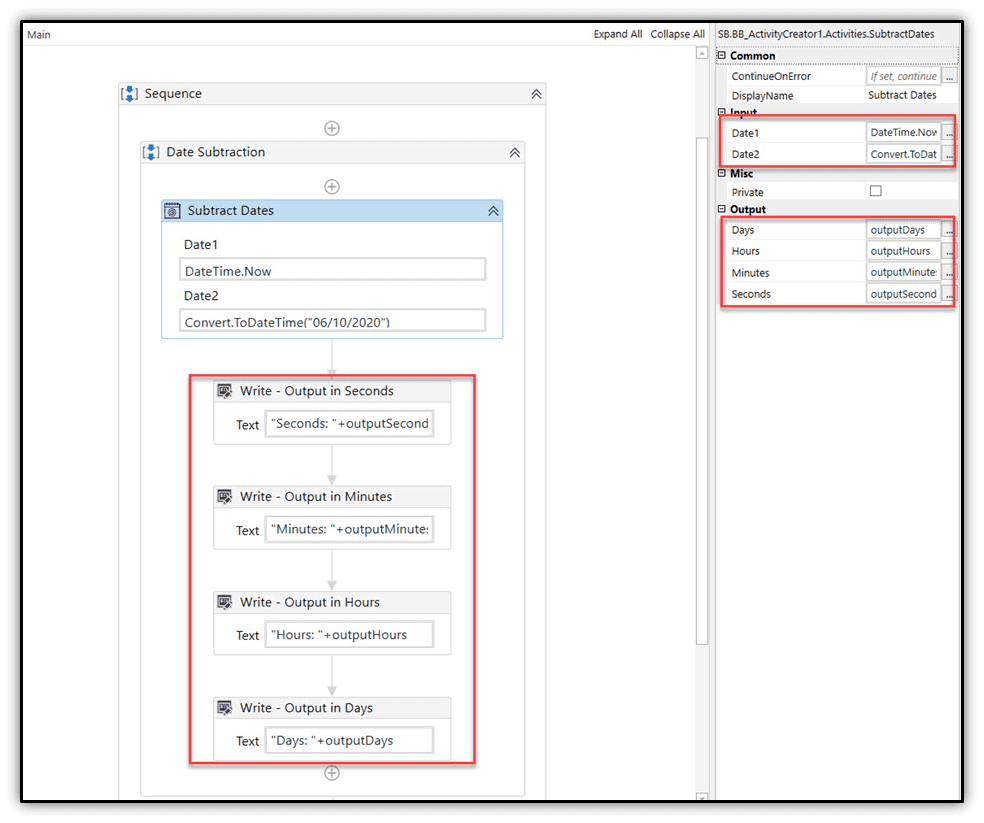
After completing these detailed steps, your custom activity should be up and running! To make any subsequent changes to your custom project, be sure to do so within Visual Studio, and re-publish before switching back over to UiPath.
UiPath Custom Activities for Enhanced Automations
By developing a better understanding of how to create custom activities in UiPath, you can now cultivate out-of-the-box processes in UiPath Studio, saving you hours of time/effort which would have otherwise been spent on mundane steps/tasks. Your custom workflows can impact small to large business processes in a virtually limitless manner, setting the ground work to develop more streamlined processes.
Looking for more on RPA?
Explore more insights and expertise at smartbridge.com/automation
Keep Reading: Measuring RPA Success Through UiPath Insights
There’s more to explore at Smartbridge.com!
Sign up to be notified when we publish articles, news, videos and more!
Other ways to
follow us: