10 Steps to Designing an Excel Template for BI Publisher
During a client project, I was engaged to create a Microsoft Excel template that was BI Publisher friendly. In this article, we’ll walk you through the steps to design a proper Microsoft Excel template for BI Publisher.
A little background
Ihave written few blog posts on Embedded BI Publisher and some of you might have gone through them already. However, until now, I’ve never had an opportunity to design an Excel template for BI Publisher (BIP), as it was not a requirement at many of our clients. Most of the time our clients use Word templates based on the type of output.
I recently received a requirement to produce XLS output for one of the custom reports at a client. This report provides the basic information about the payments made, but if there is a payment, the report should include the history of the past 9 days along with the totals (by payment date). Also, a separate report (burst) needs to be created and distributed to the supplier.
Initially I had difficulty in designing the report, but realized it was actually easy after a bit of research and trial and error. I want to share my experience, tips and tricks in designing simple XLS templates and help techies who are curious to know how easy it is.
Steps to Create an Excel Template for BI Publisher
In order to design the template, we need a template builder for Excel which is installed automatically when you install the BI Publisher Desktop plug-in. Here are the 10 simple steps to create an XLS template.
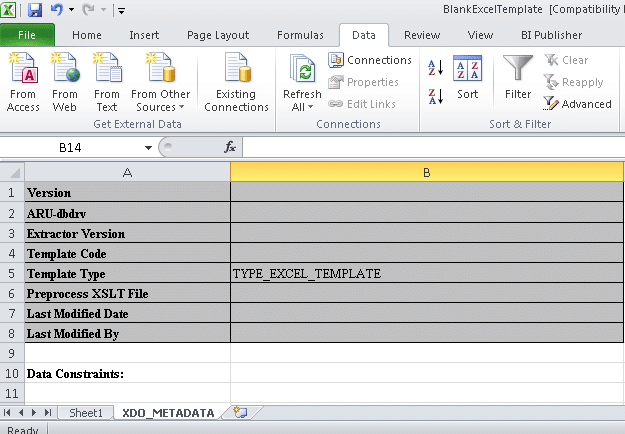
Step 1. Get the ‘BlankExcelTemplate’ from the sample Excel template which comes along with your desktop tool and save it with the name you prefer. XDO_METADATA sheet is required for BIP to process the template and add calculations. Hide this sheet before you attach the template.
Step 2. Obtain the XML data file and identify the columns you want to display on your excel report.
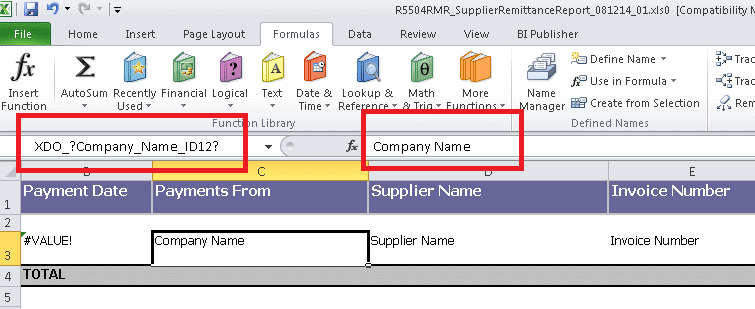
Step 3. To map the XML element in excel, we should enter the prefix XDO_? then followed by element name in the name box. For example, ‘ XDO_?Company_Name_ID12?’
Step 4. Select the cell and enter the XML element in the name box with XDO_ prefix and enter the name of the cell in the formula bar to display text on the template then press enter.
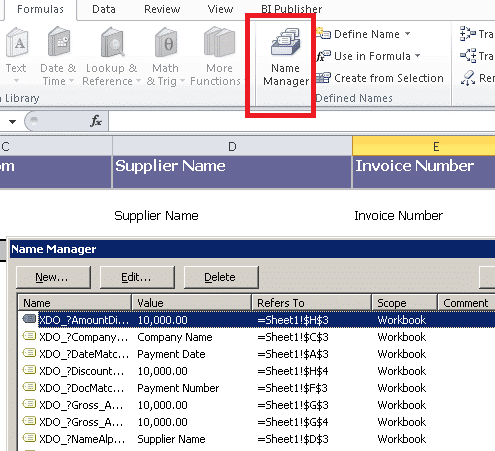
Step 5. Repeat the above step for remaining columns. After entering all columns, all the names will appear as shown below in Name Manger dialog box.
Step 6. To add calculations for example, total the gross amount for each payment date, we have to define the name in the name box by selecting the cell. Total_Gross is the name defined here.

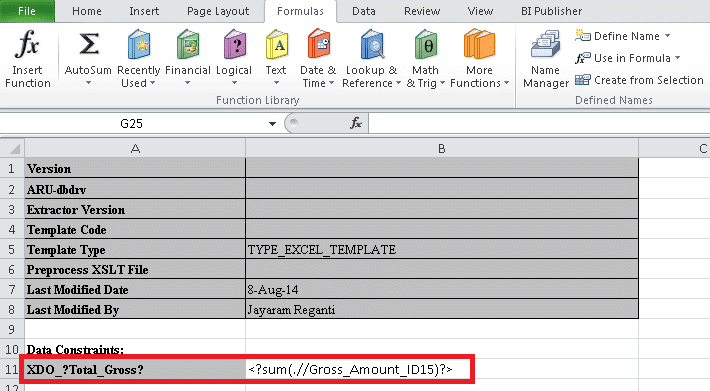
Step 7. Once the name is defined for the calculation, add the calculation in the XDO_METADATA sheet as shown below.
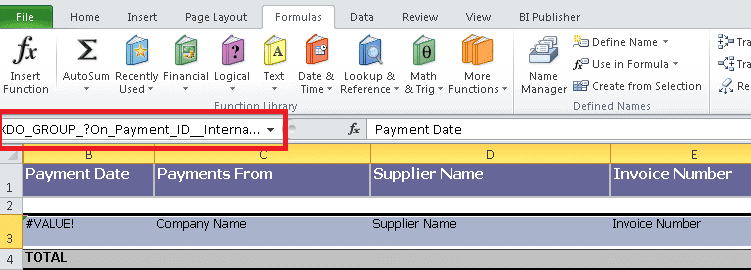
Step 8. To create group in the template like ‘for each’ in the word template, select the cells you want to repeat and enter the XML element name with the prefix XDO_GROUP_ in name box. In this example, On_Payment_ID_Internal is the level break header where we display one record for each payment.
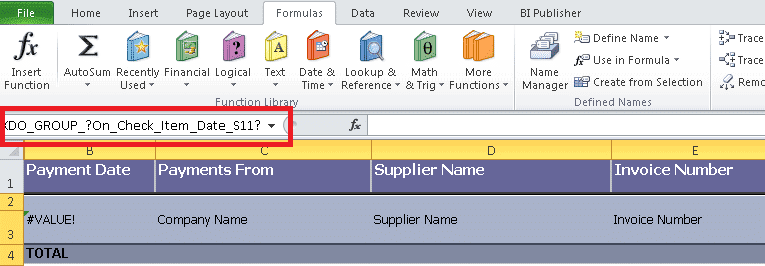
Step 9. In order to repeat the section for each payment date, select the rows 1, 2, 3 and 4 then enter the element name with prefix XDO_GROUP_. In the example, On_Check_Item_Date_S11 is the level break header.
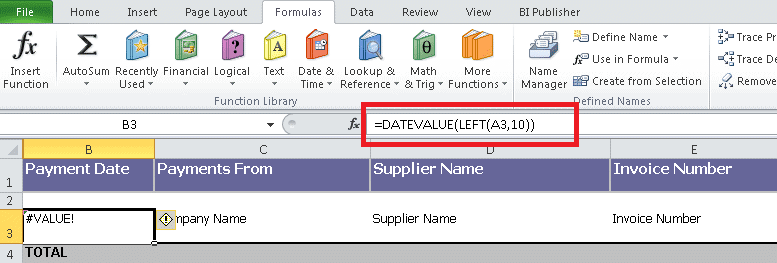
Step 10. XML file produces the date in YYYY-MM-DD format by default. In order to display the date in MM-DD-YYYY format, use the DATEVALUE function after mapping the original date element. In this example, date is mapped to column A (hidden) and used function to display the date based on column A.
Keep Reading: Unknown BI Publisher Templates for JD Edwards
Looking for more on BI Publisher?
Explore more insights and expertise at smartbridge.com/jdedwards
There’s more to explore at Smartbridge.com!
Sign up to be notified when we publish articles, news, videos and more!
Other ways to
follow us:


